

How to Animate Images with Kusa AI Image Animator
Transforming static images into dynamic animated videos has never been easier. With AI image animation technology, you can bring your photos to life in seconds—no video editing skills required. Whether you want to create engaging social media content, enhance your marketing materials, or simply add motion to your personal memories, AI image animation opens up endless creative possibilities.
This comprehensive guide will walk you through how to animate images using Kusa AI Image Animator, a powerful and user-friendly tool that transforms any photo into a professional 5-second animated video with just a few clicks.
What Is AI Image Animation?
AI image animation is a cutting-edge technology that uses artificial intelligence to add realistic motion to static images. Unlike traditional video editing that requires frame-by-frame animation or complex software, AI image animators analyze your photo and generate natural movement based on your instructions—called motion prompts.
The technology behind AI animation uses advanced deep learning models to:
- Understand the content and structure of your image
- Predict realistic motion patterns
- Generate smooth frame interpolation
- Create fluid video transitions
With tools like Kusa AI Image Animator, this complex process happens automatically in seconds, making professional-quality animation accessible to everyone.
Why Animate Your Images with AI?
Before diving into the how-to, let's explore why AI image animation has become so popular:
1. Social Media Engagement
Animated content receives significantly higher engagement rates than static images. Videos capture attention in crowded feeds and encourage viewers to stop scrolling.
2. Marketing and Advertising
Bring product photos to life, create eye-catching promotional content, and enhance your brand storytelling with dynamic visuals.
3. Personal Creativity
Transform family photos, artwork, or illustrations into memorable animations. Add motion to portraits, make landscapes come alive, or create unique gifts.
4. Content Creation Efficiency
Generate video content quickly without filming or complex editing. Perfect for content creators, designers, and marketers working under tight deadlines.
5. Professional Results Without Skills
No need to learn complex video editing software. AI handles the technical work while you focus on creative direction.
How to Animate Images with Kusa AI Image Animator: Step-by-Step Guide
Ready to create your first AI-animated video? Follow this simple four-step process to transform your static images into stunning motion videos.
Step 1: Visit KusArt and Access the AI Image Animator
First, navigate to the KusArt AI Image Animator. The tool is accessible directly from your browser—no software download or installation required.
What you'll need:
- A web browser (Chrome, Firefox, Safari, or Edge)
- An internet connection
- Your source image ready for animation
Step 2: Upload Your Image and Add Motion Prompts
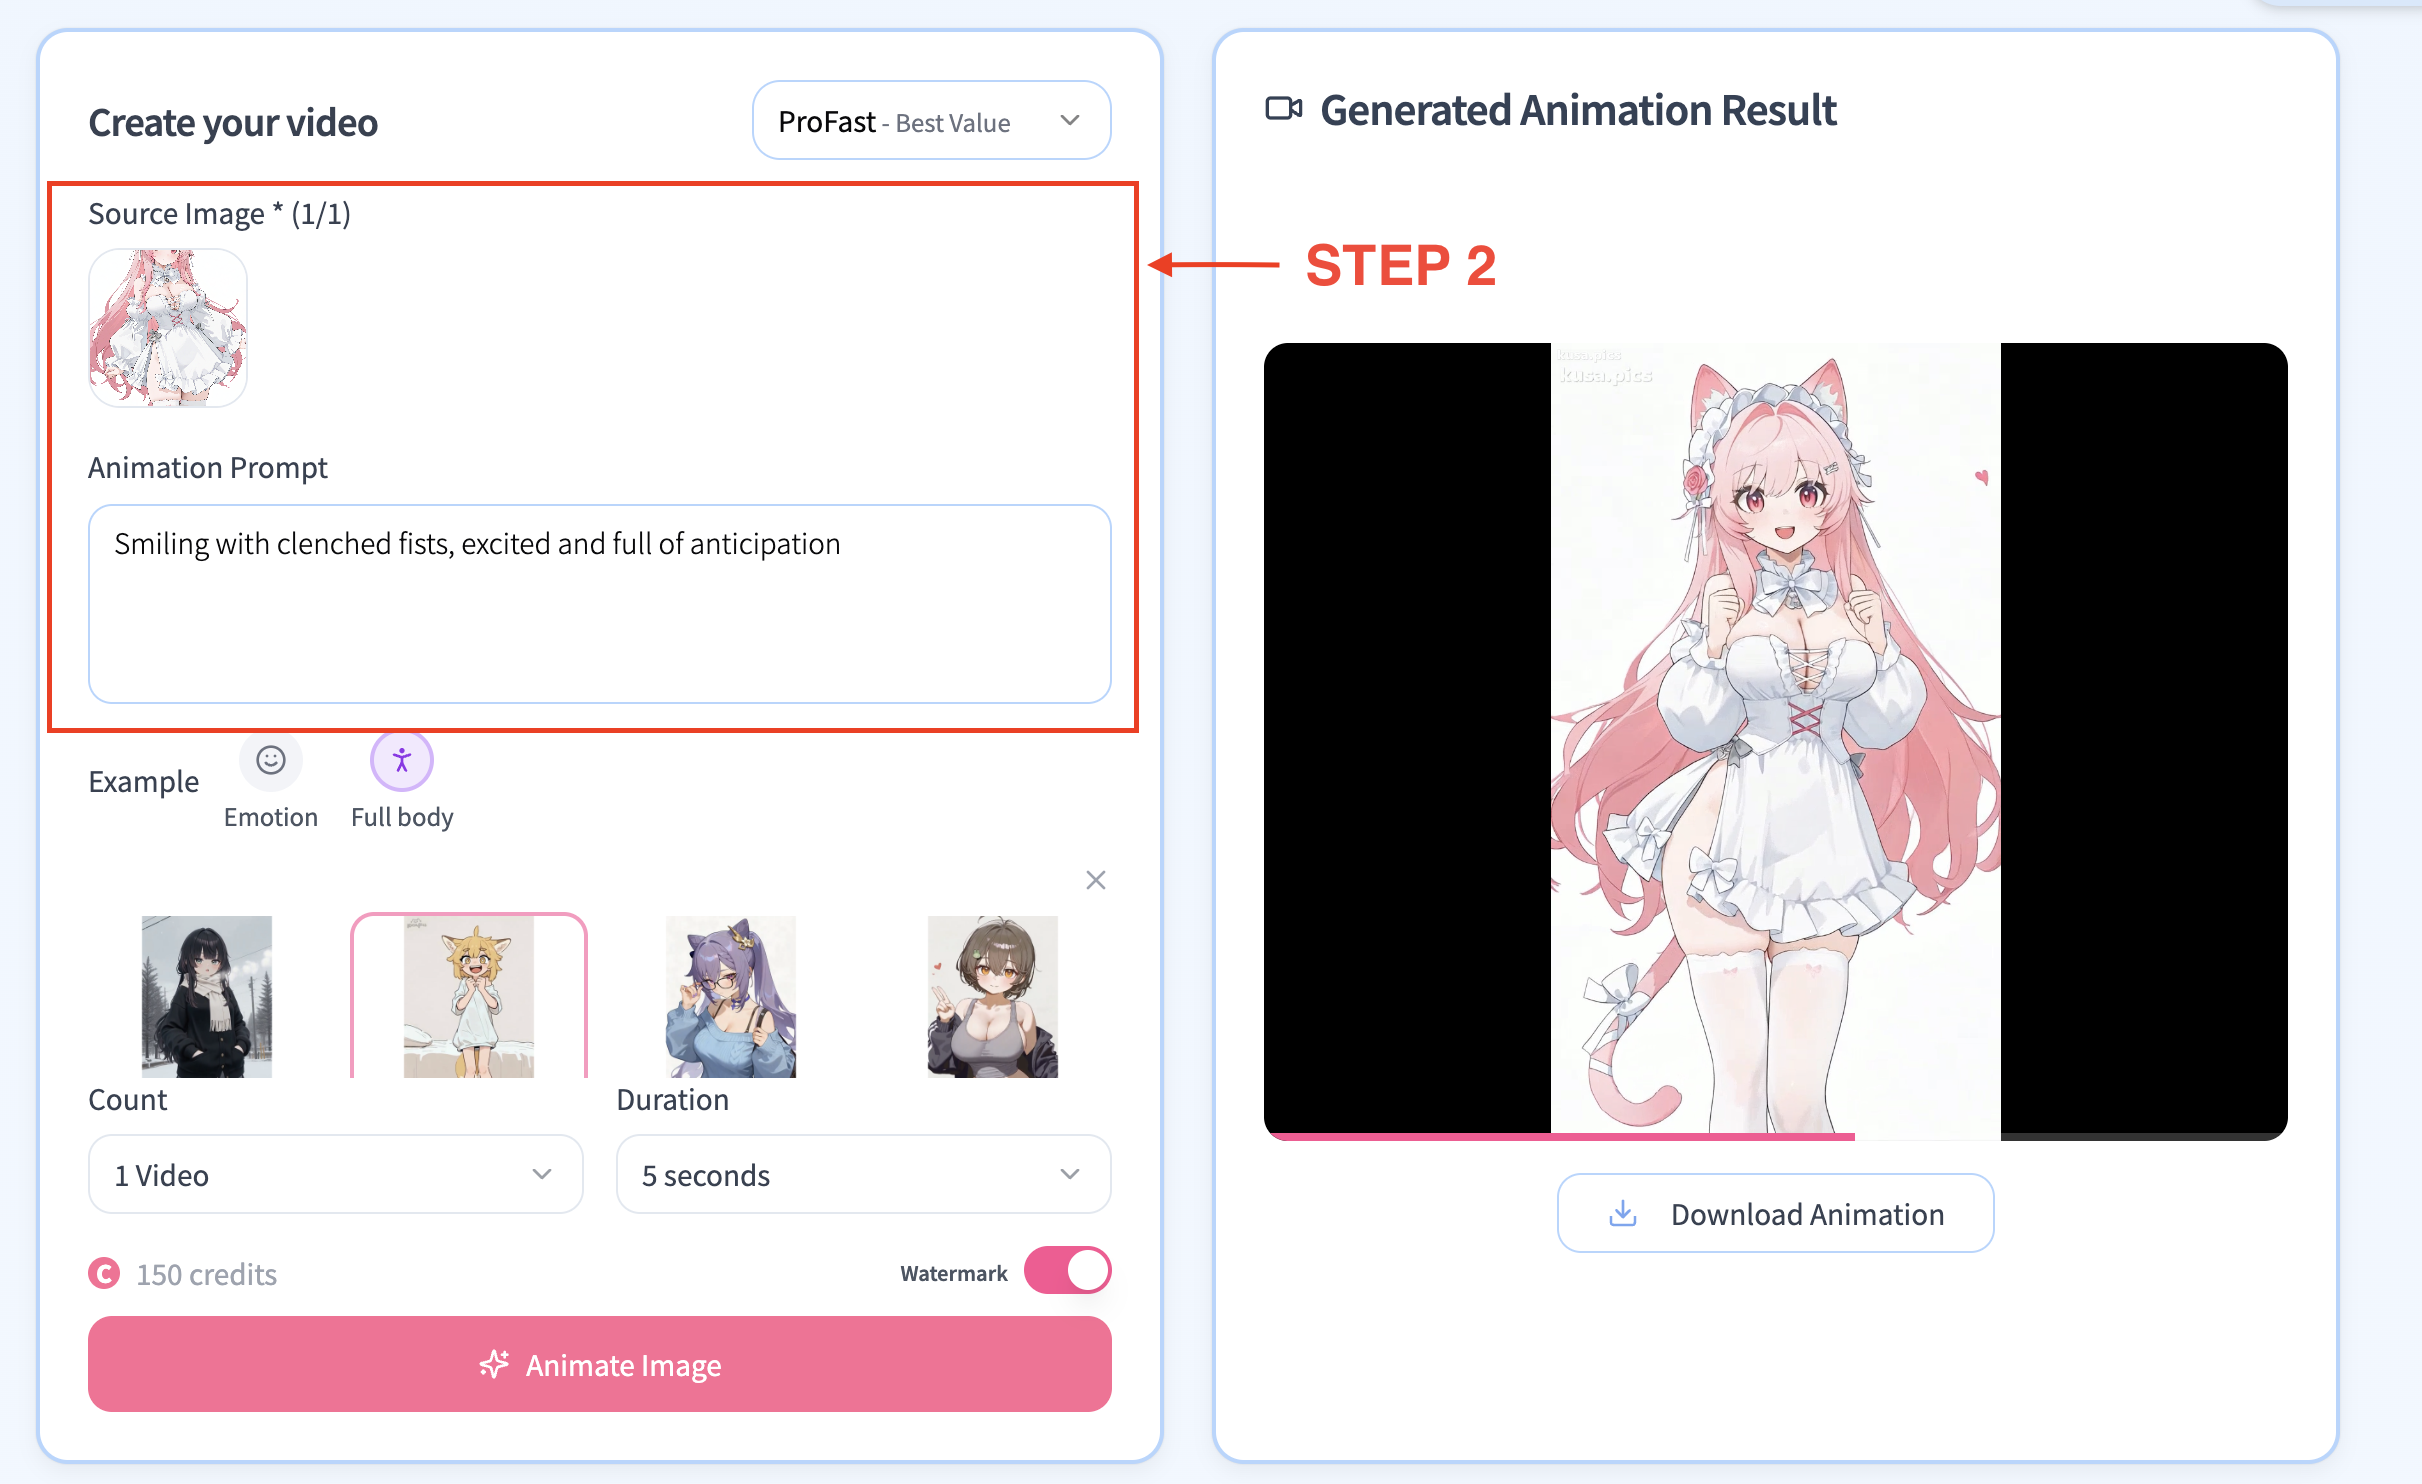
Once you're on the Image Animator page, it's time to bring your image to life.
Upload Your Image
Click the upload area or drag and drop your image file. Kusa AI Image Animator supports common image formats including:
- JPG/JPEG
- PNG
- WebP
Image selection tips:
- Use high-quality images (recommended: 1024x1024 pixels or higher)
- Choose images with clear subjects and good composition
- Avoid heavily compressed or blurry photos
- Consider the motion you want to create when selecting your image
Add Motion Prompts
Motion prompts are text descriptions that tell the AI how to animate your image. This is where your creativity comes into play.
Example motion prompts:
For portraits and characters:
- "gentle head turn, soft smile"
- "hair blowing in the wind"
- "eyes blinking, slight nod"
- "looking around, curious expression"
For landscapes and nature:
- "clouds moving across the sky"
- "water flowing gently"
- "leaves rustling in the breeze"
- "waves crashing on shore"
For objects and products:
- "slow rotation, 360 degrees"
- "floating upward with sparkles"
- "pulsing glow effect"
- "camera zoom in, dramatic reveal"
Can't think of a prompt? Kusa AI Image Animator offers ready-made motion templates you can choose from! Simply browse through popular motion styles and select one that fits your image.
Step 3: Customize Your Animation Settings
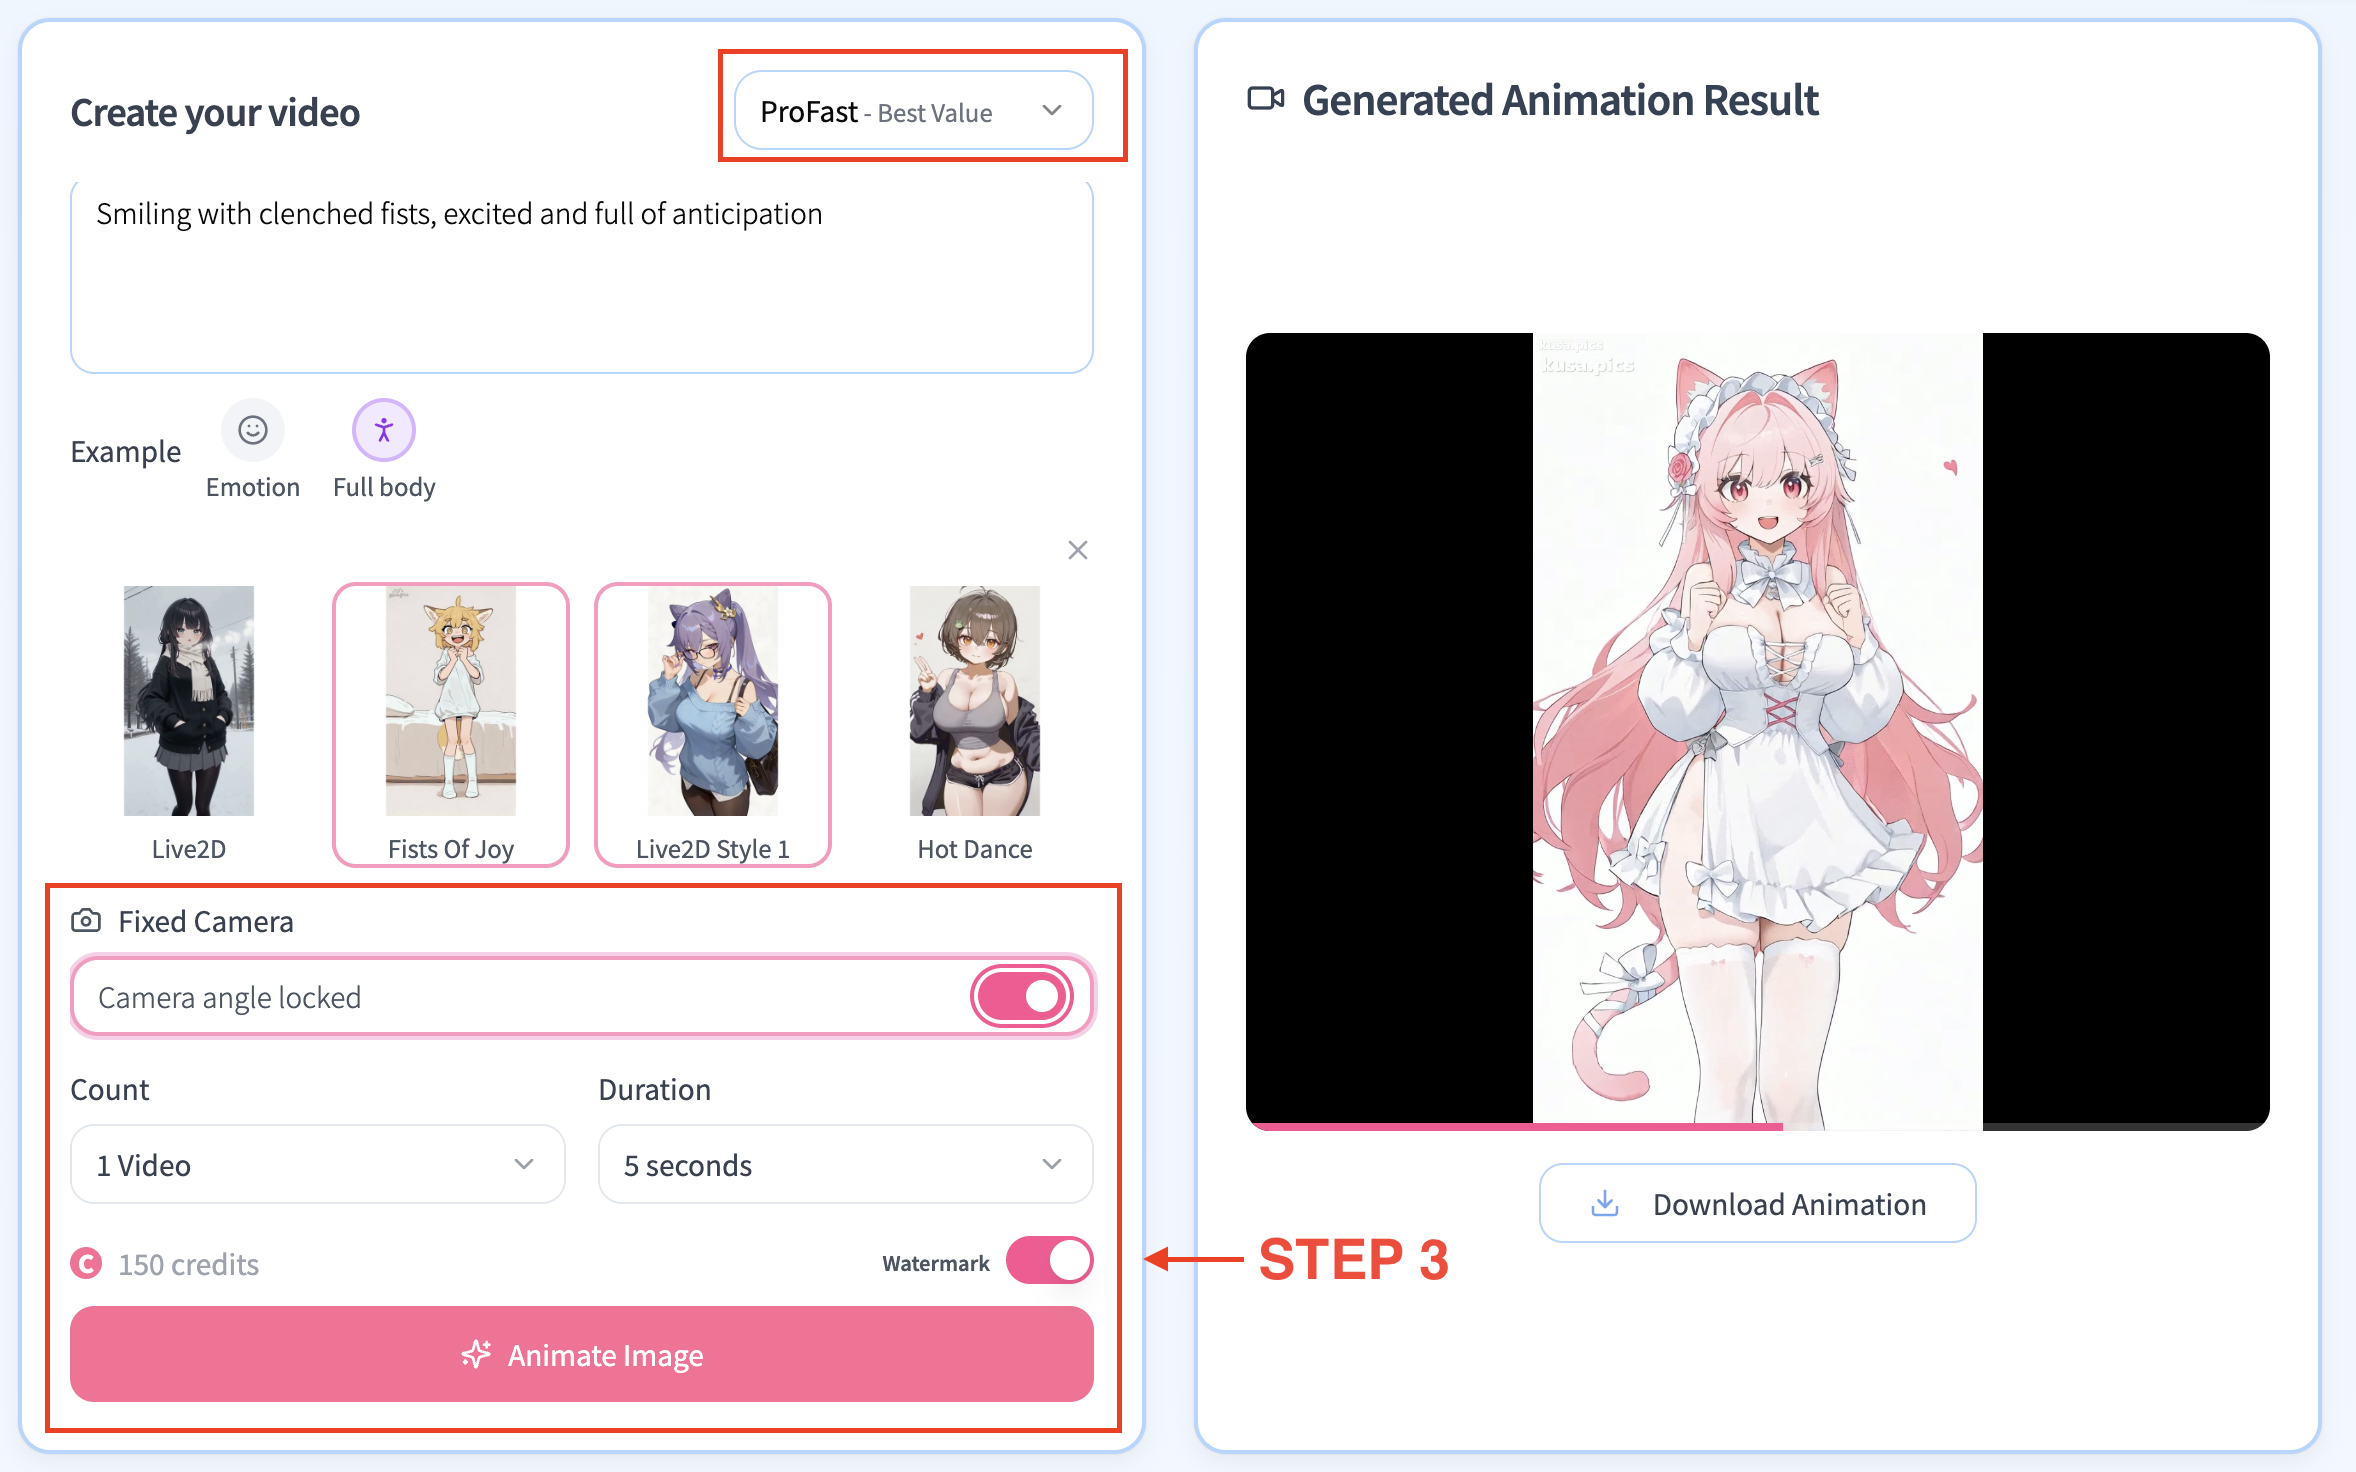
Before generating your animation, customize the output to match your needs. Kusa AI Image Animator offers several professional settings:
Number of Videos
Choose how many variations you want to generate in one go (typically 1-4 videos). Generating multiple videos to select best quality video.
Recommendation: Start with 2 videos if you're experimenting, or choose 1 if you have specific requirements and want faster processing.
Duration
Select the length of your animated video. Options typically include:
- 5 seconds (standard, balanced length)
- 10 seconds (extended, detailed motion)
Best practice: 5-second animations work well for most social media platforms and provide enough time for smooth, noticeable motion without feeling too long.
Watermark Options
Decide whether to include kusapics watermark on your generated video:
- With watermark: Free option, includes a small KusArt watermark
- Without watermark: Premium option for clean, professional output
Video Model Selection
Kusa offers three AI video models, each optimized for different priorities:
1. Pro Fast Best Value
- Price: Most affordable option
- Quality: Good quality suitable for social media and testing
- Best for: Beginners, bulk content creation, quick previews, social media posts
- Recommendation: Perfect if you're new to AI animation and want to experiment without high costs
2. Fast Balanced Performance
- Price: Mid-range pricing
- Quality: Higher quality than Pro Fast
- Best for: Content creators needing quick turnaround with good quality
- Recommendation: Ideal when you need both quality and speed—great for regular content production
3. Pro Maximum Quality
- Price: Premium pricing (most expensive)
- Quality: Highest quality output with best motion smoothness and detail
- Best for: Professional projects, commercial use, portfolio pieces, client deliverables
- Recommendation: Choose Pro when quality is paramount and you need the absolute best results
Model comparison example:
Budget-conscious creator → Pro Fast
Active content creator → Fast
Professional agency → Pro
Step 4: Generate and Export Your Animation
Once you've configured all settings, it's time to create your animated video!
1.Generate Your Animation
- Review your settings one final time
- Click the "Generate" button
- The AI will begin processing your image
2.Processing time varies by:
- Selected model (Pro takes longer than Fast models)
- Number of videos requested
- Current server load
You'll see a progress indicator showing the generation status. Most animations complete within 30 seconds to 2 minutes.
3.Preview Your Results
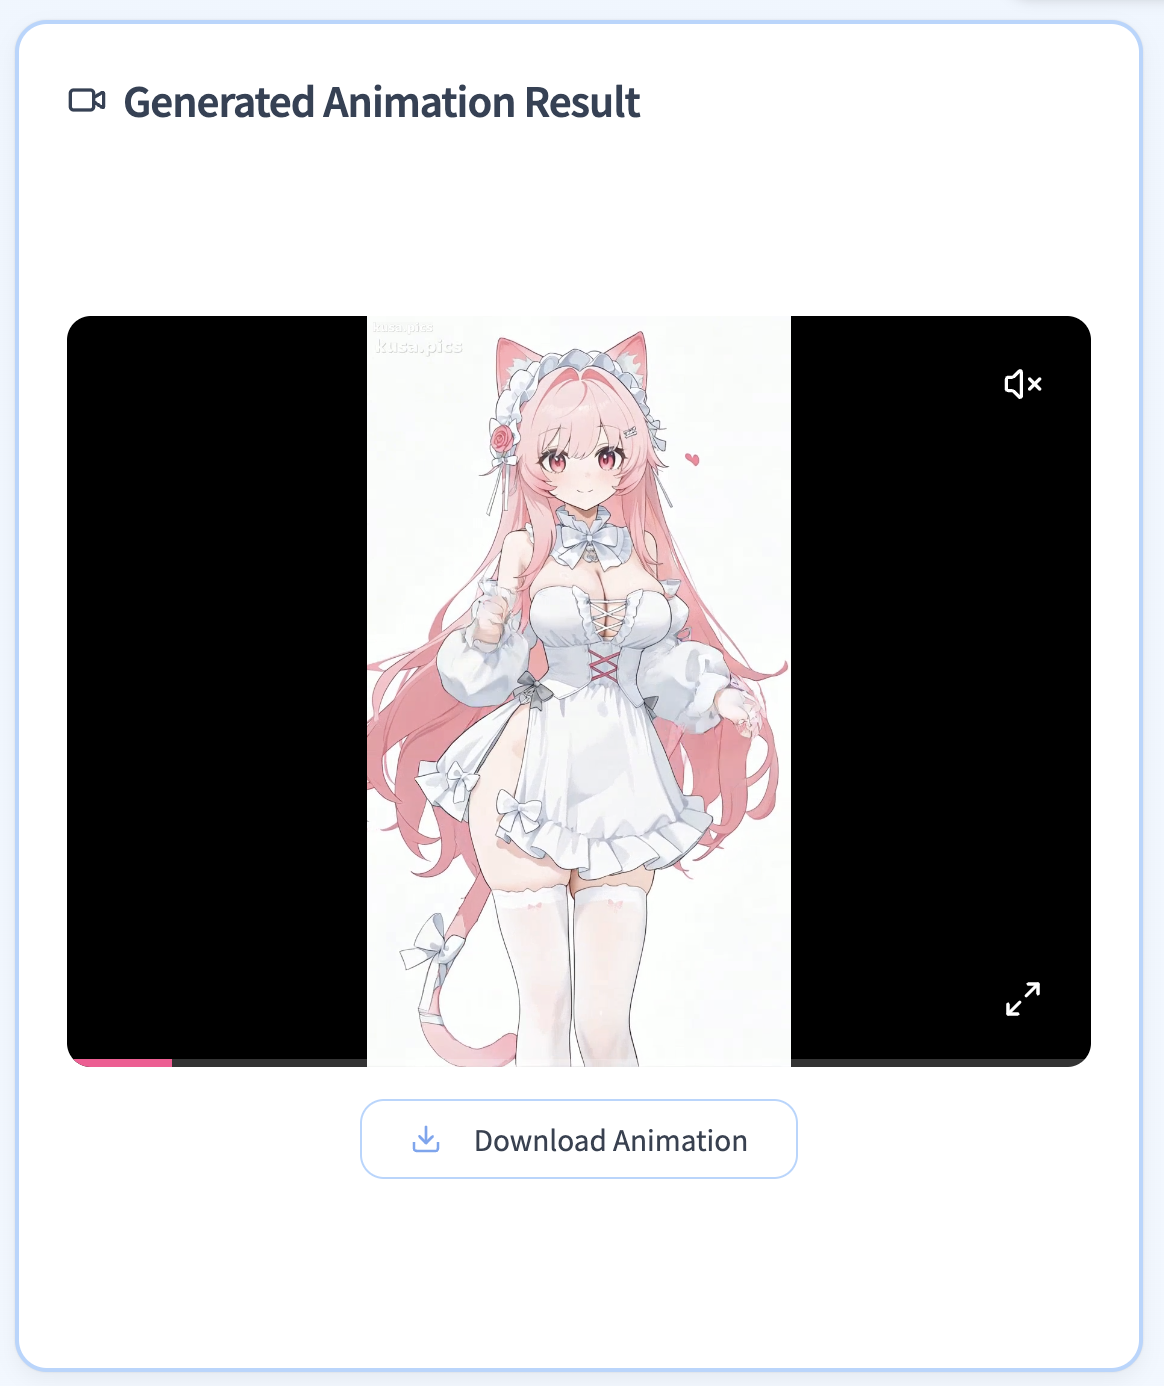
Once processing completes, your animated videos will appear on screen. Take time to:
- Play each generated variation
- Compare motion quality and smoothness
- Check if the animation matches your expectations
- Look for any artifacts or issues
Not satisfied? You can adjust your motion prompt or settings and regenerate. Experiment with different prompts to achieve your desired effect.
4.Download and Export
When you're happy with your animation:
- Select your favorite video from the generated options
- Click the download button to save the video file
- Choose your export format (typically MP4, compatible with all platforms)
Your animated video is now ready to use! You can:
- Share directly to social media
- Upload to video platforms
- Include in presentations
- Use in marketing materials
- Send to friends and family
Best Practices for Creating Stunning AI Animations
1. Write Clear, Specific Motion Prompts
Instead of "make it move," try "gentle camera pan from left to right with slight zoom in"
2. Match Motion to Image Content
Natural motions work best—don't try to make a still building walk or a portrait suddenly jump
3. Start Simple
Begin with subtle movements like breathing, blinking, or gentle camera motion before attempting complex animations
4. Use High-Quality Source Images
Better input quality = better animation output. Avoid pixelated or extremely low-resolution images
5. Experiment with Different Models
Try Pro Fast for initial tests, then upgrade to Pro for your final versions if needed
6. Consider Your Platform
Different social media platforms have different video requirements—adjust duration and aspect ratio accordingly
7. Save Successful Prompts
Keep a library of motion prompts that work well with different image types for future reference
Final Thoughts: Start Animating Your Images Today
AI image animation has democratized video creation, making it accessible to everyone regardless of technical skills or budget. With Kusa AI Image Animator, you can transform any static photo into an engaging animated video in just four simple steps.
Whether you're a content creator looking to boost engagement, a marketer seeking eye-catching visuals, or simply someone who wants to bring personal photos to life, AI animation offers limitless creative possibilities.
Ready to get started?
Visit Kusa AI Image Animator now and turn your first image into a stunning animated video. No experience needed—just upload, describe the motion, and watch your image come to life!
Looking for more creative AI tools? Explore Kusa OC Maker to design original anime characters, or check out our other guides on How to Create Your Own OC.


